이전에는 HttpURLConnection 과 JsonParser 를 사용해 api 를 호출하는 방식을 사용했었는데 이번에는 홀맨님의 조언에 따라 RestTemplate 으로 바꿔보는 작업을 진행했다.
이전 코드는 아래와 같다!
// Controller

@GetMapping("/saveApi")
    public String saveApi() throws IOException {
        String result = "";

        try {
            for (int i = 1; i <= 500; i += 1) {
                String apiURL = "https://api.themoviedb.org/3/movie/popular?api_key=" + KEY
                        + "&language=ko&page=" + i;

                URL url = new URL(apiURL);

                HttpURLConnection urlConnection = (HttpURLConnection) url.openConnection();
                urlConnection.setRequestMethod("GET");
                urlConnection.setRequestProperty("Content-type", "application/json");

                BufferedReader bf = new BufferedReader(new InputStreamReader(urlConnection.getInputStream(), "UTF-8"));

                result = bf.readLine();

                getApiService.saveApiInfo(result);
            }
        } catch (Exception e) {
            e.printStackTrace();
        }

        return "ok";
    }

 // Service

 public String saveApiInfo(String result) {

        JsonObject jsonObject = JsonParser.parseString(result).getAsJsonObject();

        JsonArray list = (JsonArray) jsonObject.get("results");

        for (int i = 0; i < list.size(); i += 1) {
            JsonObject contents = (JsonObject) list.get(i);

            String imageUrl = "https://image.tmdb.org/t/p/original";
            String match = "[\"]";

            contentRepository.save(
                    Content.builder()
                            .description(contents.get("overview").toString().replaceAll(match, ""))
                            .korTitle(contents.get("title").toString().replaceAll(match, ""))
                            .engTitle(contents.get("original_title").toString().replaceAll(match, ""))
                            .releaseDate(contents.get("release_date")
                                    == null ? ""
                                    : contents.get("release_date").toString().replaceAll(match, ""))
                            .genres(contents.get("genre_ids").toString().replaceAll(match, ""))
                            .imageUrl(imageUrl + contents.get("poster_path").toString().replaceAll(match, ""))
                            .createdAt(dateTime)
                            .updatedAt(dateTime)
                            .build()
            );
        }
        return "ok";
    }
먼저 RestTemplate 과 WebClient 에 대해서 알아보자. 스프링은 REST 서비스에서 endpoint (API가 서버에서 리소스에 접근할 수 있도록 가능하게 하는 URL)를 호출하는 2가지 방법이 제공하는데, 바로 RestTemplate 과 WebClient 이다. 일단 기존에 많이 사용되던 RestTemplate 은 Spring 5.0부터는 deprecated 될 예정이므로 스프링에서는 WebClient 사용을 권장하고 있다.
RestTemplate 은 api 요청을 하게 되면 한 api 의 요청에 대한 응답이 올 때까지 기다리는 동기 방식이다. 반대로 비동기 방식에는 WebClient 가 있다. WebClient 를 사용하기 위해서는 webflux 와 mono 를 익혀야 한다. 이번 프로젝트에서는 RestTemplate 를 사용했지만 프로젝트 완성 후 WebClient 를 차차 공부해서 리팩토링 하는 작업을 진행해보는 것을 내 2023년 목표로 세웠다.
이제 RestTemplate 으로 바꿔보는 작업을 시작해 보자! 이 방법은 spring boot 를 사용한다는 것을 전제로 한다. 일단 먼저 RestTemplate config 설정 파일을 utills 패키지에 만든다. RestTemplate를 사용할 때마다 객체를 생성해서 사용할 수 도 있지만, bean으로 등록하여 사용하는 방법을 택하였다.
rootUri() 메서드에 호출 할 api 의 url 을 넣어주면 되고, 보통 api 주소의 공통 부분까지 넣어놓으면 편하다. 나는 Tmdb 의 api url 을 넣어놓았다. 그리고 BufferingClientHttpRequestFactory 객체를 통해 아래 코드와 같이 타임아웃을 제어할 수 있다. 만약 타임아웃이 필요 없다면 "RestTemplate resttemplate = new RestTemplate();" 이렇게 생성해도 된다.
에러가 발생할 경우, 에러 응답이 body로 넘어오게 되는데, 어떤 에러를 받을 것 인지, 받고 난 후 어떻게 처리할 것 인지를 따로 정의할 수 있다. 이를 errorHandler() 에 넣어준다.
@Configuration
@RequiredArgsConstructor
public class RestTemplateConfig {

    @Bean
    public RestTemplate restTemplate(RestTemplateBuilder restTemplateBuilder) {
        return restTemplateBuilder
                .requestFactory(() -> new BufferingClientHttpRequestFactory(new SimpleClientHttpRequestFactory()))
                .setConnectTimeout(Duration.ofMillis(5000)) // connection-timeout
                .setReadTimeout(Duration.ofMillis(5000)) // read-timeout
                .additionalMessageConverters(new StringHttpMessageConverter(Charset.forName("UTF-8")))
                .rootUri(String.format("https://api.themoviedb.org/3"))
                .errorHandler(new RestTemplateResponseErrorHandler())
                .build();
    }
}
RestTemplateResponseErrorHandler 클래스. 정해진 에러코드만 받아서 처리했다.
public class RestTemplateResponseErrorHandler implements ResponseErrorHandler {

  @Override
  public boolean hasError(ClientHttpResponse response) throws IOException {
    return response.getStatusCode() == HttpStatus.BAD_REQUEST
      || response.getStatusCode() == HttpStatus.INTERNAL_SERVER_ERROR;
  }

  @Override
  public void handleError(ClientHttpResponse response) throws IOException {

  }
}
본격적으로 데이터를 호출해보자. (LocalDateTime 과 api key 는 내 로직에 필요한 코드라서 api key 가 필요 없는 api 의 경우 생략해도 된다.)
HttpHeaders 로 header 를 정의해 주고, url 을 정의해 주고, restTemplate.exchange() 메서드로 api 를 호출한다.
ResponseEntity<Map> resultMap = restTemplate.exchange(url, HttpMethod.GET, entity, Map.class);
이 한 줄의 코드로 api 를 호출해 map 으로 전달받는다. 전달받는 값은 json 형태이므로 String 자체로 받아서 파싱해도 된다. restTemplate 의 경우 map 이나 사용자가 정의한 class 등 다양한 형태로 데이터를 파싱해서 받을 수 있다. 예시는 아래와 같다.
ResponseEntity<원하는 클래스 타입> result = restTemplate.exchange(url, HttpMethod.GET, entity, 원하는 클래스 타입.class);
내 실제 코드에는 없지만 호출 결과로 http status code, 헤더 정보, 실제 데이터가 존재하는 body정보를 확인할 수 있다. 데이터를 제대로 전달받았는지 확인하려면 이 api 호출 코드와 아래 코드들을 더 추가해주면 된다.
//api 호출 코드
ResponseEntity<Map> resultMap = restTemplate.exchange(uri.toString(), HttpMethod.GET, entity, Map.class);

    result.put("statusCode", resultMap.getStatusCodeValue()); //http status code를 확인
    result.put("header", resultMap.getHeaders()); //헤더 정보 확인
    result.put("body", resultMap.getBody()); //실제 데이터 정보 확인

    //데이터를 제대로 전달 받았는지 확인 string형태로 파싱해줌
    ObjectMapper mapper = new ObjectMapper();
    String jsonInString = mapper.writeValueAsString(resultMap.getBody());


    return jsonInString;
원하는 데이터만 뽑아내기 위해서는 resetTemplate.exchange() 메서드 호출 이후 코드를 아래와 같이 추가해주면 된다.
ArrayList<Map> list = (ArrayList<Map>) resultMap.getBody().get("results");내가 db 에 저장하려는 json 형태는 다음과 같은데, body 에서 "results" 라는 이름이 가진 value 에 접근하겠다는 의미이다.
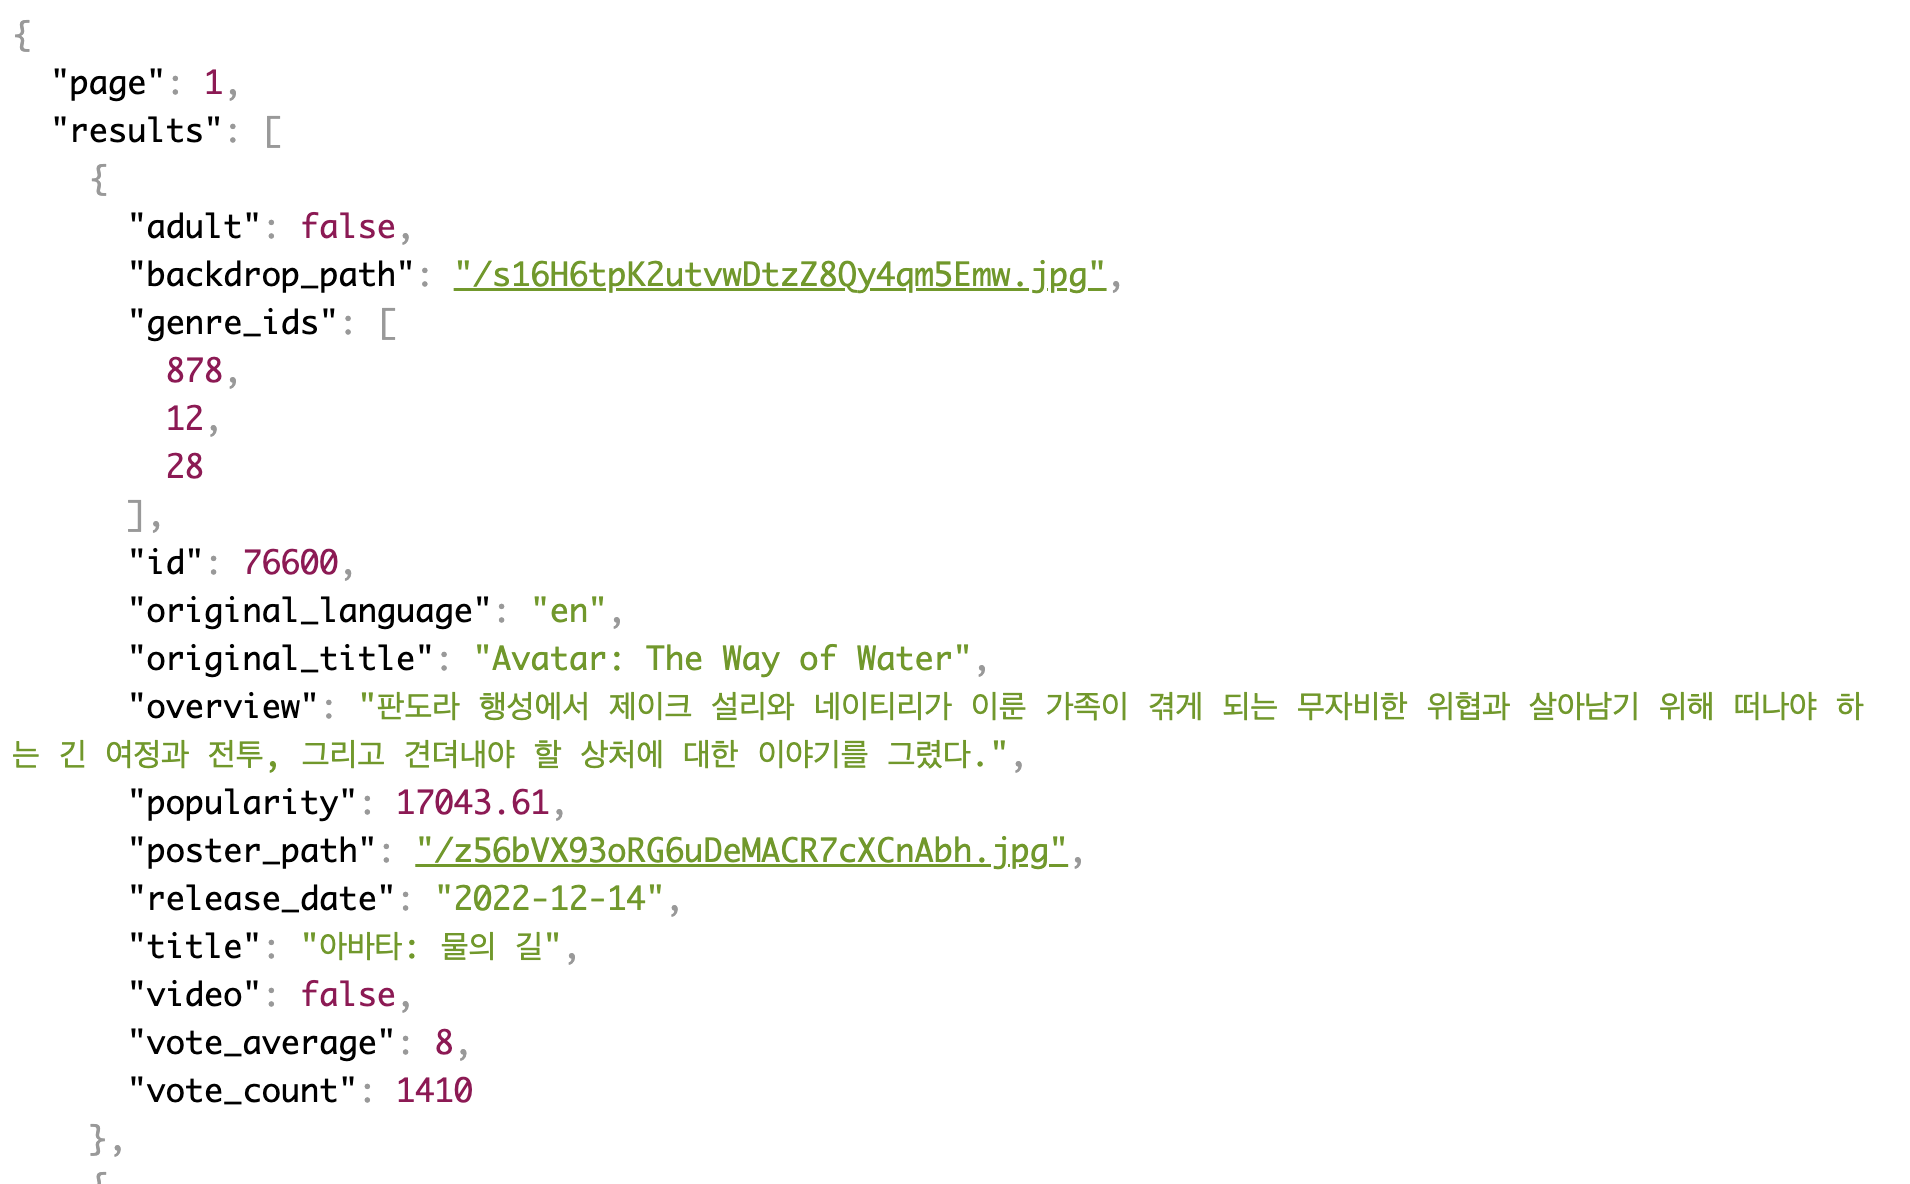
그리고 그 저장된 list 를 forEach 문으로 반복하면서 하나씩 레포지토리에 저장해주면 완성! db 에 잘 들어가 있는 것을 확인할 수 있다.
아래는 전체 코드이다. 참고로, 원하는 값만 뽑아서 저장하기 위해 builder 가 사용되었는데, 이렇게 빌드를 해주기 위해서는 Content 라는 엔티티 클래스에다 @Builder 어노테이션을 꼭 붙여주어야 한다.
@RestController
@RequestMapping("/api")
public class BackdoorController {
    private final RestTemplate restTemplate;
    private final ContentRepository contentRepository;
    private final PerformerRepository performerRepository;

    @Value("${tmdb.api-key}")
    private String apiKey;

    LocalDateTime dateTime = LocalDateTime.now();

    public BackdoorController(RestTemplate restTemplate,
                              ContentRepository contentRepository,
                              PerformerRepository performerRepository) {
        this.restTemplate = restTemplate;
        this.contentRepository = contentRepository;
        this.performerRepository = performerRepository;
    }

    @GetMapping("/setupContents")
    public String setupContents() throws IOException {
        HttpHeaders headers = new HttpHeaders();
        HttpEntity<?> entity = new HttpEntity<>(headers);

        for (int i = 1; i <= 10; i += 1) {
            String url = "/movie/popular?"
                    + "api_key=" + apiKey + "&language=ko&page=" + i;

            ResponseEntity<Map> resultMap = restTemplate.exchange(url, HttpMethod.GET, entity, Map.class);

            ArrayList<Map> list = (ArrayList<Map>) resultMap.getBody().get("results");

            for (Map data : list) {
                String imageUrl = "https://image.tmdb.org/t/p/original";
                String match = "[\"]";

                contentRepository.save(
                        Content.builder()
                                .tmdbContentId(data.get("id").toString().replaceAll(match, ""))
                                .tmdbGenreId(data.get("genre_ids").toString().replaceAll(match, ""))
                                .imageUrl(imageUrl + data.get("poster_path").toString().replaceAll(match, ""))
                                .korTitle(data.get("title").toString().replaceAll(match, ""))
                                .engTitle(data.get("original_title").toString().replaceAll(match, ""))
                                .releaseDate(data.get("release_date")
                                        == null ? ""
                                        : data.get("release_date").toString().replaceAll(match, ""))
                                .popularity(data.get("popularity").toString().replaceAll(match, ""))
                                .description(data.get("overview").toString().replaceAll(match, ""))
                                .createdAt(dateTime)
                                .build()
                );
            }
        }

        return "Contents completely saved!";
    }
}
'TIL' 카테고리의 다른 글
| Plmography 프로젝트 작업 로그 #18 - DB 쿼리문 + 기년회 (22.12.30 TIL) (0) | 2022.12.30 |
|---|---|
| Plmography 프로젝트 작업 로그 #17 - 컨텐츠 상세 페이지 작업 (22.12.29 TIL) (0) | 2022.12.29 |
| Plmography 프로젝트 작업 로그 #15 - AWS S3 이미지 업로드하기 (22.12.27 TIL) (0) | 2022.12.27 |
| Plmography 프로젝트 작업 로그 #14 - 스프린트 점검 (22.12.26 TIL) (0) | 2022.12.26 |
| Plmography 프로젝트 작업 로그 #13 - 백엔드로 api 옮기기 (22.12.25 TIL) (0) | 2022.12.25 |

댓글